Collaboration
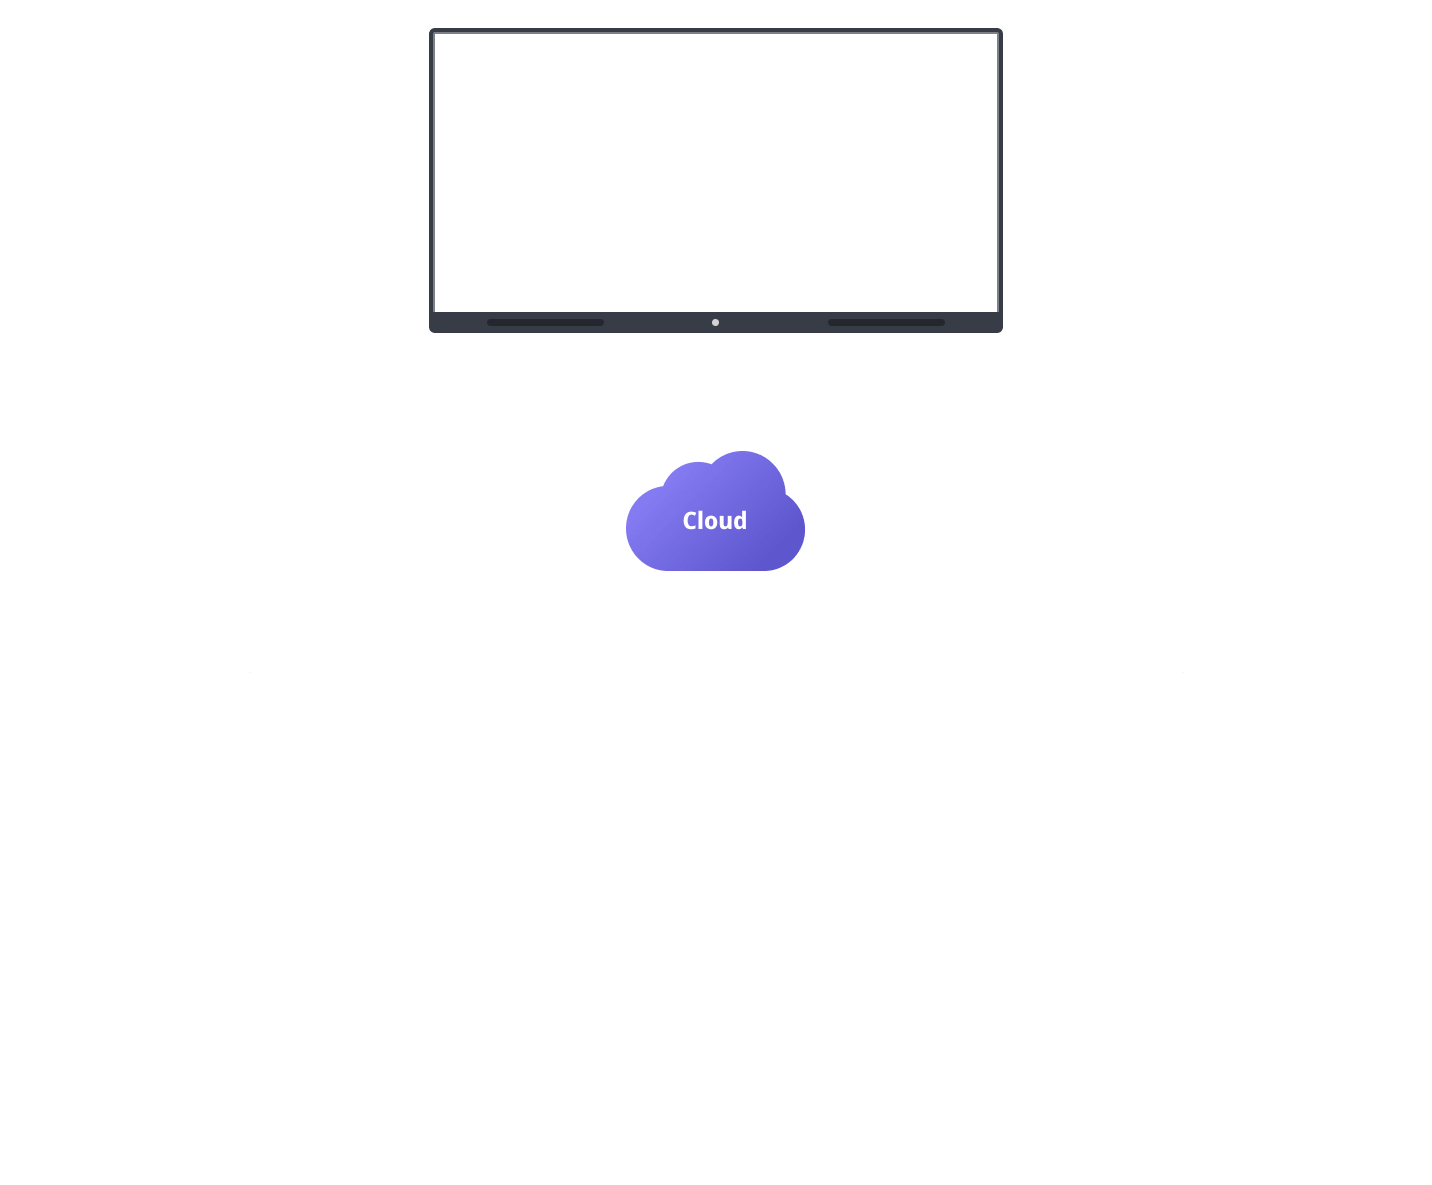
Collaboration is a feature that allows you to share a board with multiple users and collaborate with them. When you start Collaboration in LG CreateBoard Lab app on your device, it synchronizes and updates changes to the board among users in real time through its cloud service.
Here’s how it works. When you execute Collaboration, you (teacher) act as a host and create a class in the cloud. You can invite your students to the class. Using the class URL and class code, they can easily join the class from their own web browsers. You can interact with your students by sharing the board and writing or drawing together on the board in real time.
How to execute
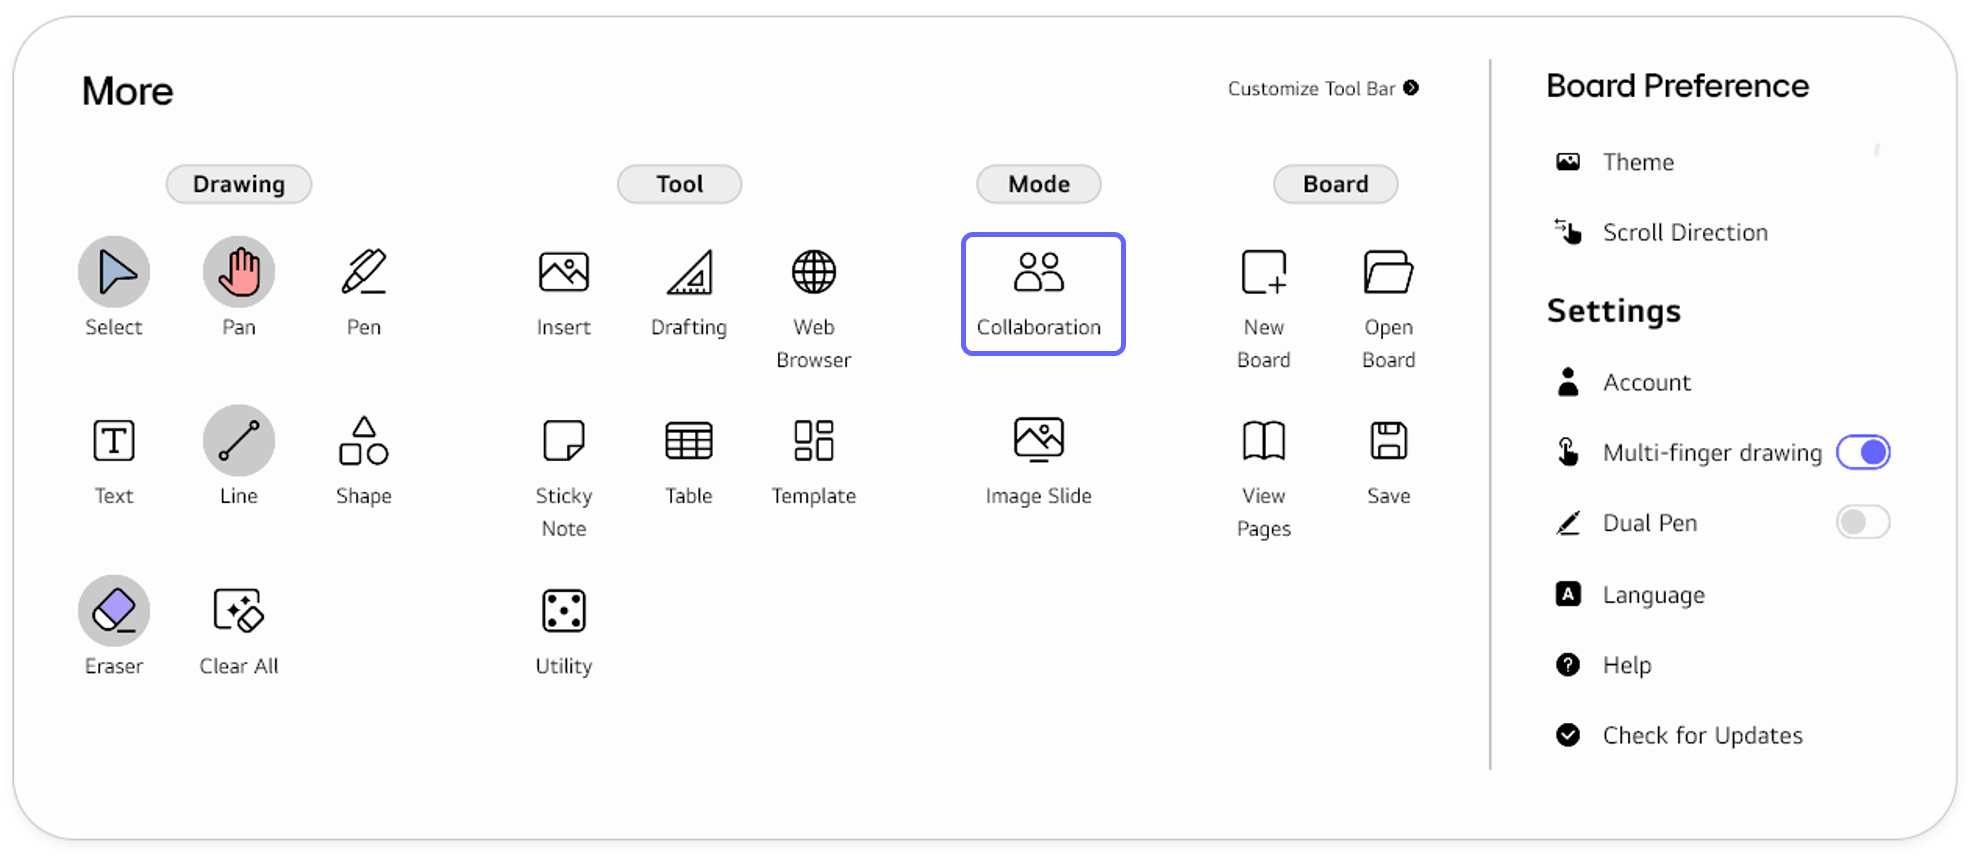
If the Tool bar already displays the Collaboration button, you can simply tap it to execute. Otherwise, tap the More button to display the entire menu and then choose Collaboration.
If you frequently use this item, refer to Customize Tool bar to pin it to the Tool bar for easy access.
Collaboration, you must be signed in to LG CreateBoard Lab. If you are not signed in, tab the More button in the Tool bar to open the full menu and then go to Settings > Account to sign in.
Usage & tips
Collaboration can be used in a class or business meeting for multiple users to share a single board, write or draw on it, as well as communicate and collaborate with one another.
Collaboration types
LG CreateBoard Lab offers three types of collaboration. Choose the type that best suits your situation.
| Types | Description |
|---|---|
Real-time
|
All participants connect to a class and share a single board in real time. All participants' inputs are reflected on the board in real time. |
Space
|
The host can divide the space of the board into several areas and allocate them to the participants. Although each participant shares the same board, he/she can only write or draw in the area assigned only to him/her. |
Snapshot
|
The host can share a snapshot of the board as an assignment. |
Open and join a class
Open a class
The host can open a class and invite participants as follows.
-
Ensure that you are signed in. If not, sign in from
Tool bar>More>Settings>Account. -
Select the Collaboration type and run Collaboration..
-
A
Class URLandClass Code (Pin Code)are generated, as shown below.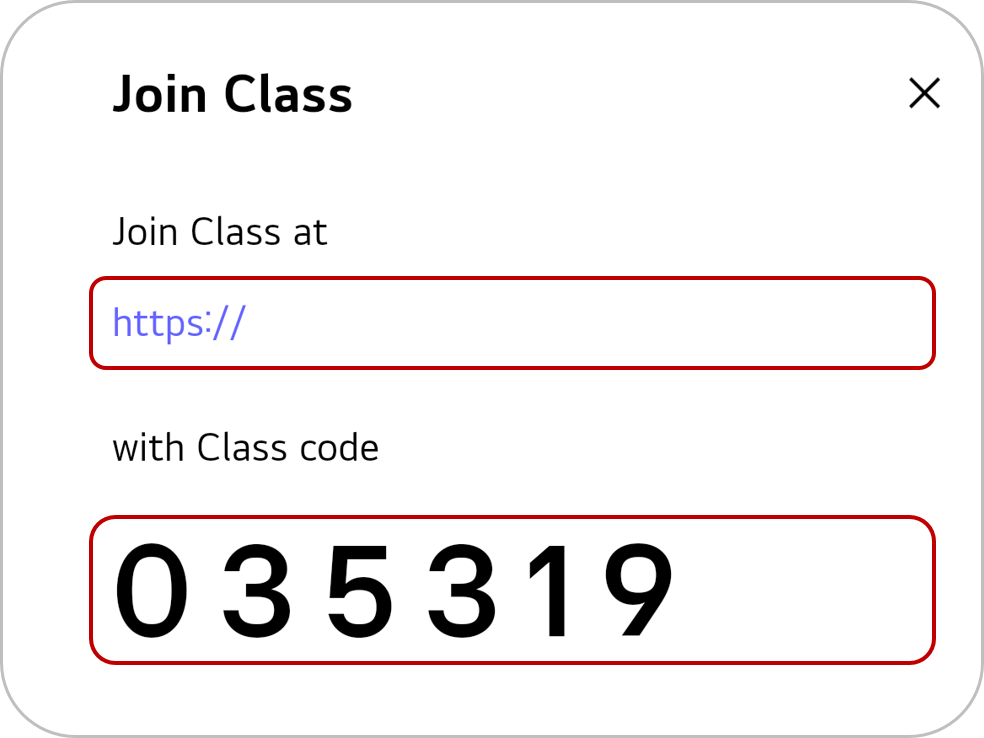
-
Share the
Class URLandClass Code (Pin Code)with your participants.
Join the class
The participants can join the class from their own web browsers without having to install any app.
-
Access the
Class URLin the web browser. -
Enter the
Class Code (Pin Code).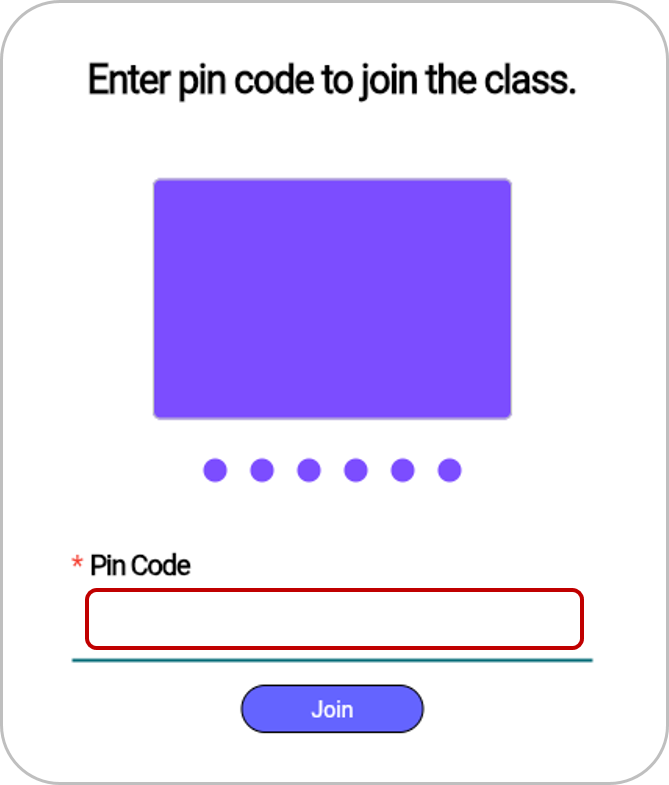
-
Enter the
Nickname.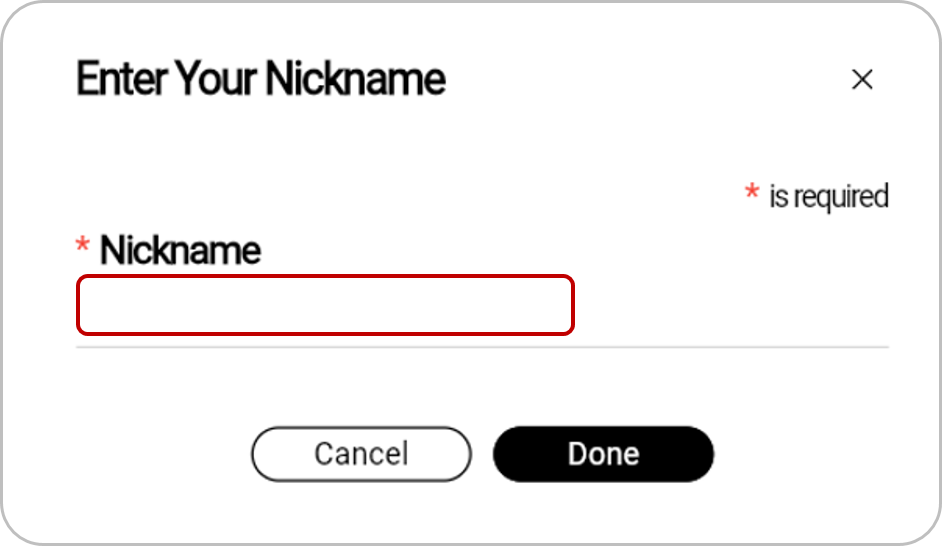
Manage participants
The host can manage the participants.
Real-time type
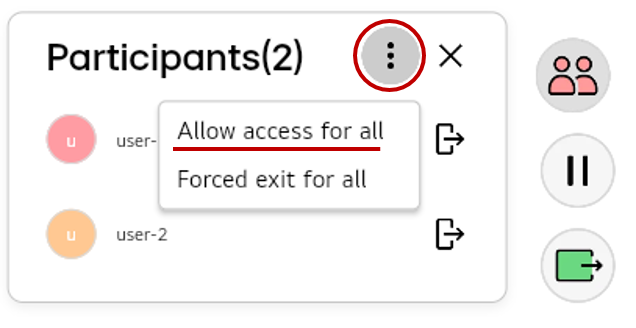
Limit/allow access for all
To prevent the board from being updated by all participants, select More > Limit access for all in the pop-up menu at the bottom right of the board
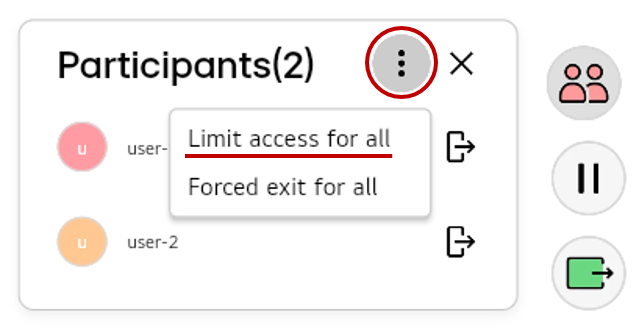
To disable this, select More > Allow access for all in the pop-up menu at the bottom right of the board.
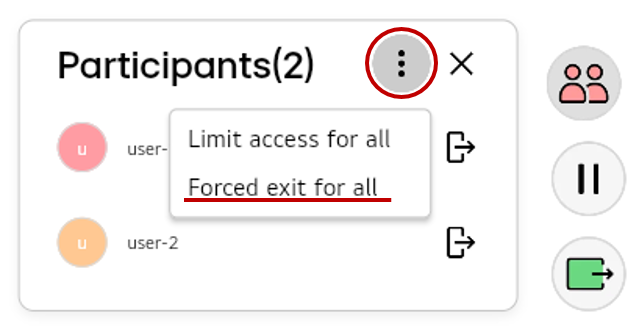
Forced exit for all
To force all participants out of the class, select More > Forced exit for all in the pop-up menu at the bottom right of the board.
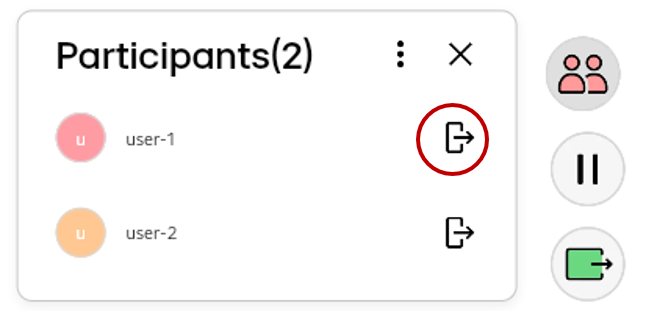
Forced exit for a user
To force a specific participant out of the class, select the following button next to the participant in the pop-up menu at the bottom right of the board.
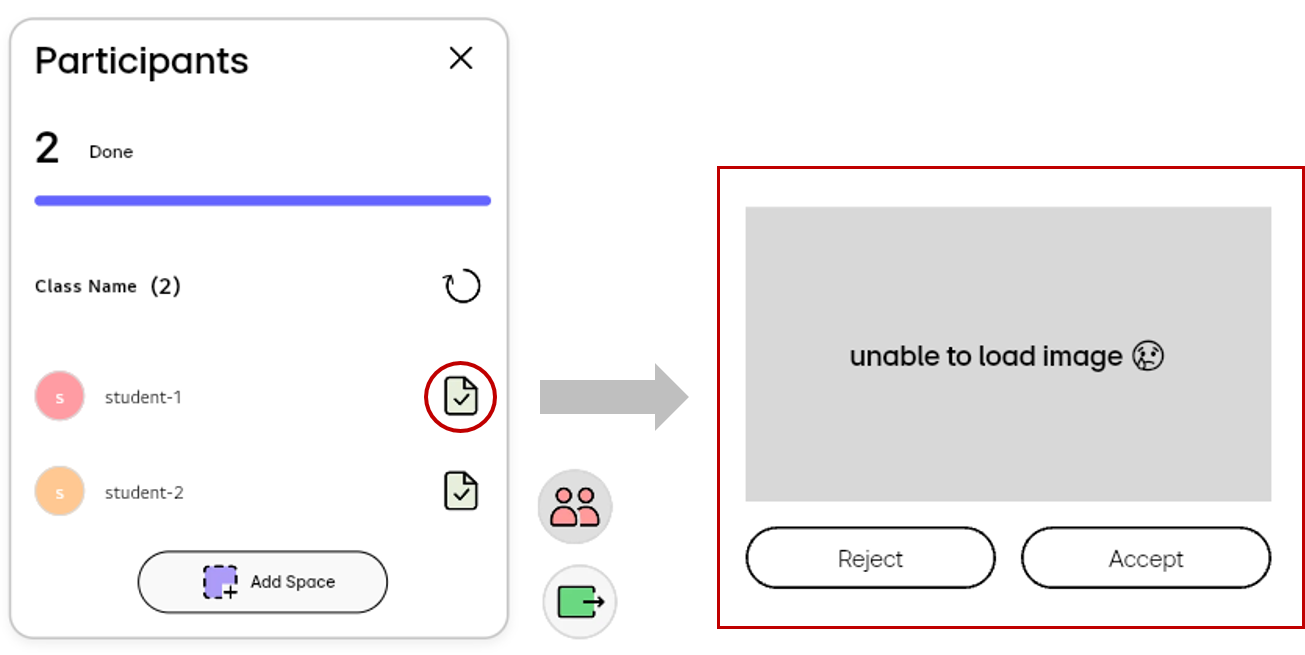
Space/snapshot type
Reject/accept
The host can either reject or accept each user’s participation in the class in the pop-up menu at the bottom right of the board.
Share the board
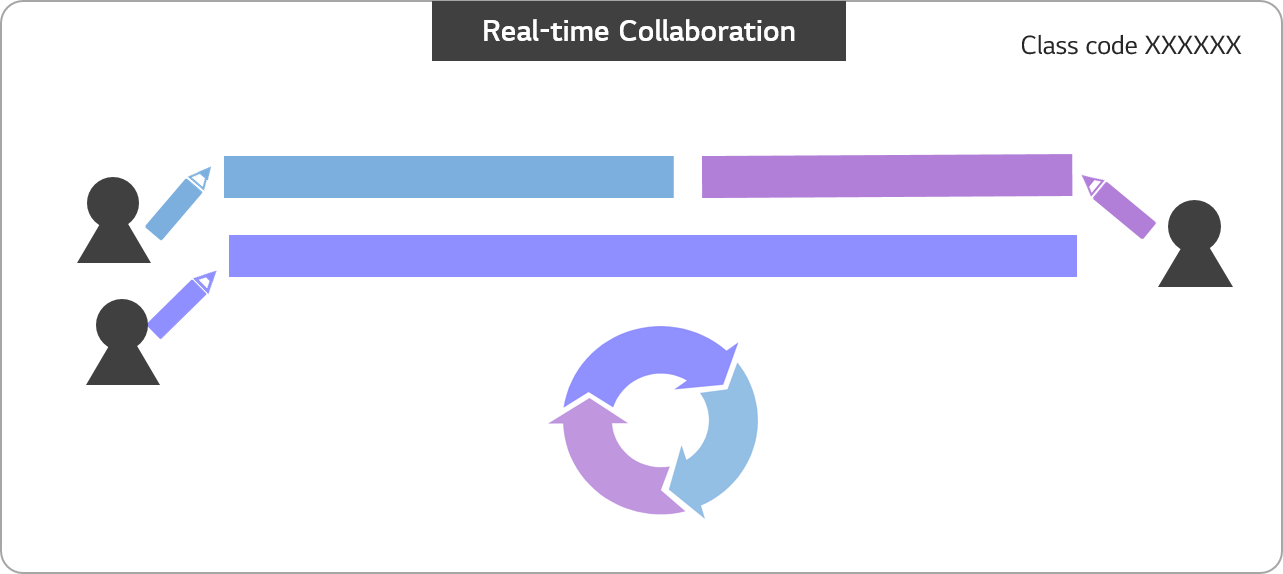
Real-time type
In the Real-time type, all participants can view and write on the entire area of a single board simultaneously.
Space type
In the space type, the host can divide the board into several areas and assign each area to each participant. Each participant can see the entire board, but his/her ability to write on the board is limited to the area assigned only to him/her. For example, a teacher (host) can encourage students (participants) to participate by dividing the board into several areas and having students solve a problem and submit the answer in their respective areas as follows.
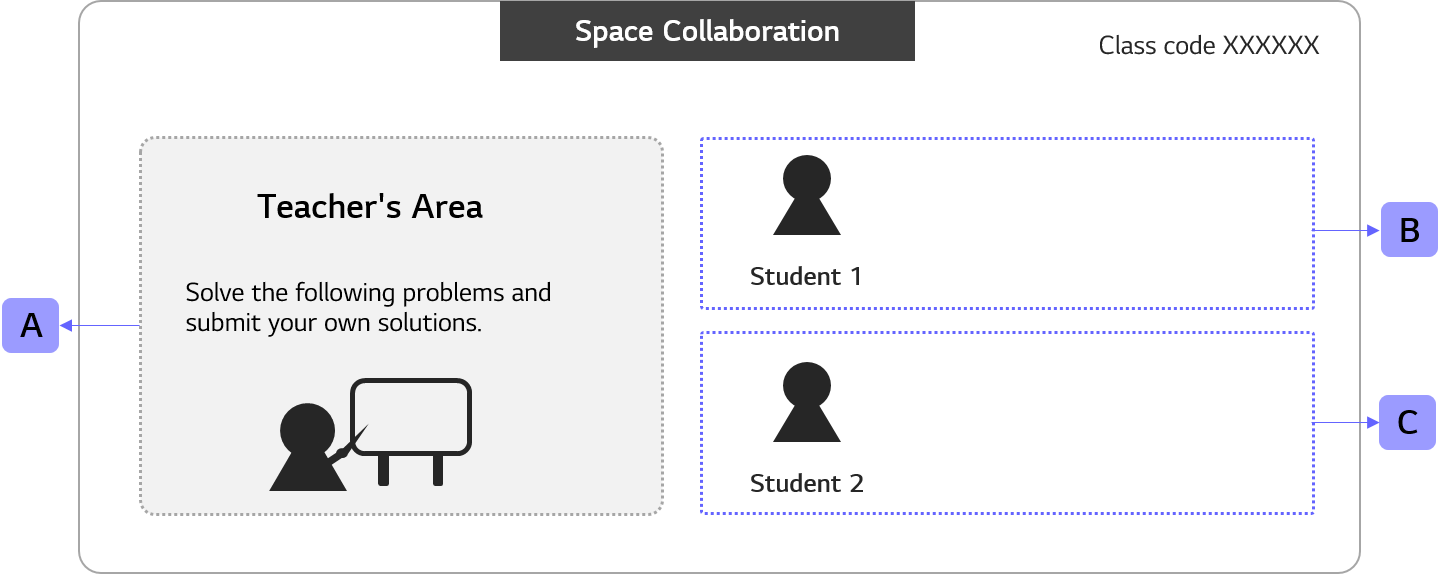
Host (teacher)
-
In the pop-up menu at the bottom right of the board, select the
Add Spacebutton.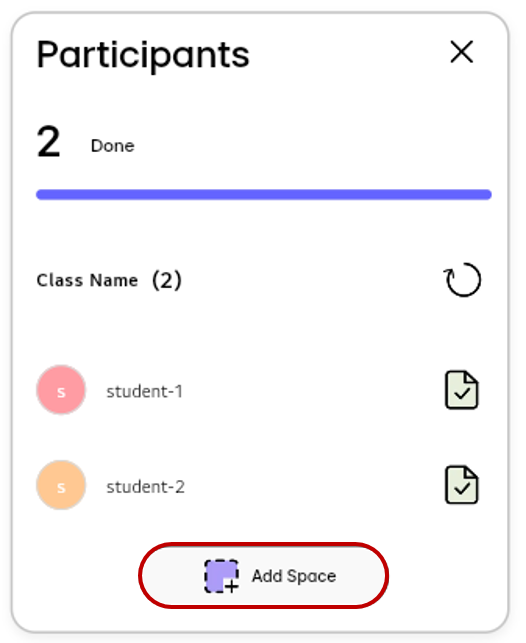
-
Drag on the board to designate an area.
-
For each area, assign it to a student as follows.
- Area B: Student 1
- Area C: Student 2

Participants (students)
Now, let’s take a look at how students can utilize the board by area.
[View]
Both students can have the same view of the entire board.
| Area A | Area B | Area C | |
|---|---|---|---|
| Student 1 | Available | Available | Available |
| Student 2 | Available | Available | Available |
[Write]
The students can only write in their own assigned area.
| Area A | Area B | Area C | |
|---|---|---|---|
| Student 1 | NOT Available | Available | NOT Available |
| Student 2 | NOT Available | NOT Available | Available |
Write or draw on the board
Host
The host uses the board through the Lap App installed on the device. For detailed information on how to write or draw on the board in the app, refer to the Features | Device App User Guide.
Participants
Participants can use the board on a web browser. For detailed information on how to write or draw on the board, refer to Board Editor | Web App User Guide.
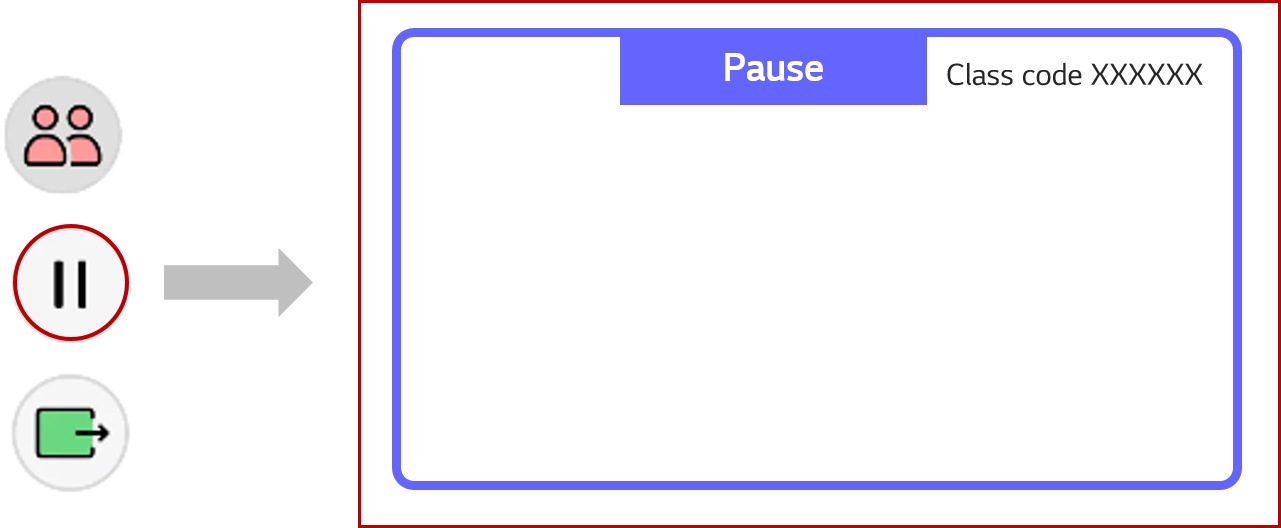
Pause the class
Pause is only supported in Real-time type.
The Host can pause the class in the following menu at the bottom right of the board. In the Pause mode, the border of the board is marked in blue, and all participants cannot write on the board.
End the class
The Host can end the class in the following menu at the bottom right of the board.
